Stage II Creating galleries and uploading images
User Guide Stage II: Creating galleries and uploading images
Galleries and Images
1. Creating Galleries
1.1 Introduction
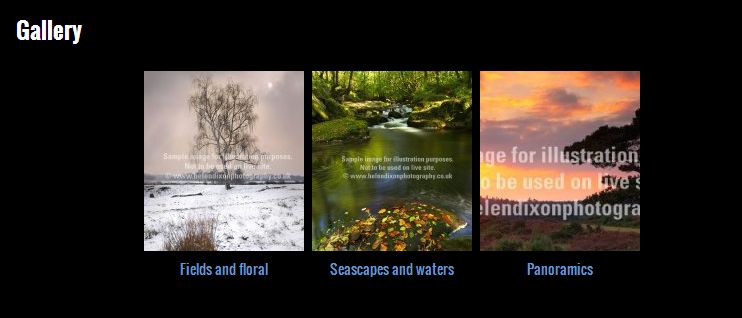
Now that you have chosen a template, it's best to get some images uploaded before working on any other parts of your site. The first stage is to ensure you have some galleries to load them into. Most of our template styles have a main Gallery section, typically called ‘Gallery’, in which there are individual galleries such as ‘Seascapes’ and ‘Panoramics’. You can have as many of these individual galleries as you like, name them and put them in whatever order you like.
1.2 Editing the main Gallery section
If you’re happy with the word ‘Gallery’ and the order it's in your main menu, skip to 1.3 below. If you’d like to change this, click on Content in the admin system > Then Sections > Click on the pencil icon to the right of the default gallery section.
You will probably only need to change the following fields.
Title. The heading that appears in your main menu and at the top of the page, eg Gallery.
Intro. Optional text which appears at the top of the section.
Show in menu and Sort order. Tick if you want this section to appear in the menu and use Sort order to dictate the order in which it appears.
One gallery per section
You don't have to have multiple galleries in a section. Sometimes sites have multiple sections which appear in the menu, each with just one gallery in them.
It's often effective not to show the gallery index page in this scenario, going straight to the first photo. To do this, edit the section and tick Don't show gallery index
«cliktip»
1.3 Stage II: Creating/editing individual galleries
Click on Images/Galleries > Galleries > Click on the New button at the top to create a new gallery, or click on the pencil icon at the right to edit one of the default records.
Gallery name. Enter the name of the gallery, eg Andalucia.
Description. This is optional text which appears at the top of the gallery, eg ‘Here are some of my favourite shots...’
Now Save. your gallery
Repeat this process for however many galleries you would like.
1.4 Other options
The system also provides a range of other options for structuring your galleries, which you may wish to come back to at a later stage. These include:
Creating sub-galleries. You may have an individual gallery called, say, ‘Landscapes’ and you would like to set up sub-galleries within Landscapes called 'The Peaks' and 'The Lakes'. Create the main gallery in the usual way, e.g. Landscapes, but don't assign any images to it > Then create the new gallery, e.g. The Peaks. A new field will appear for this called Sub gallery of. Select Landscapes from the drop down options. Repeat the process.
Create more than one gallery section. This can be useful if you only have a few galleries as you can add them into your main menu. Create a new section in Content > Sections called, say, Landscapes, ensuring it's a galery section. Then create an individual gallery and name it Landscapes as well. Under the field Section, select which gallery section you would like it to appear in.
Create a drop down menu within your gallery section. This is ideal if you have a large number of galleries as it makes navigation easier. See Cliktips Guide B6 Drop down gallery menu for instructions.
Gallery isolation facility (Super Pros only). This allows you to set up galleries with restricted and password access. Ideal for wedding and social photography. See Cliktips Guide B5 Gallery isolation for instructions.
2. Adding images
2.1 Bulk uploads
Let’s start by uploading 3-4 images – but no more at this stage until we have shown you some other options later on. Go to Images/Galleries > Bulk uploads and follow the instructions below.
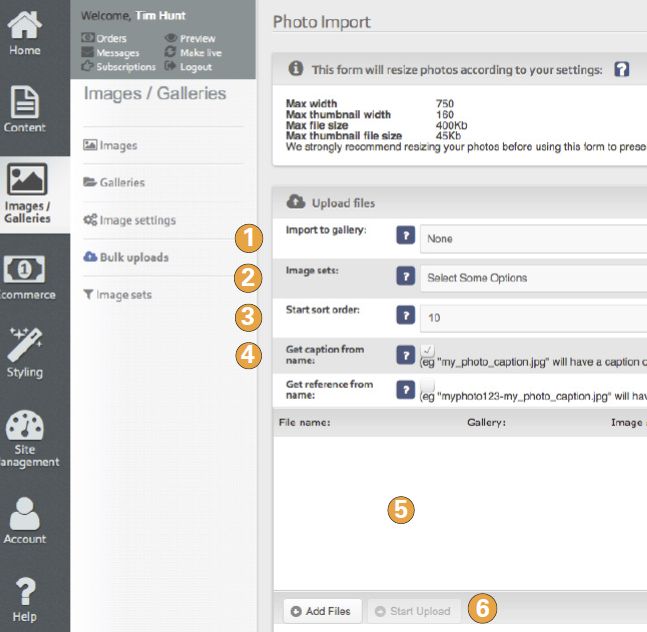
qImport to gallery. Select which gallery you would like the images to be uploaded into.
wImage sets. Rarely used for bulk uploads, so ignore for the time being.
eStart sort order. Leave at default (unless you want to change the sort order for the first uploaded image - 10 will be added for each subsequent image).
rGet caption and/or ref from file name. Tick if you would like the system to automatically generate a caption and/or reference field from the file name. We cover this in 2.3 below.
tSelect and drag the files from your computer into this box. (Users of the latest Firefox or Chrome browsers can use drag and drop to add images to the queue.) Other browsers will use the Flash plug-in which allows you to select multiple images or folders via a dialog.
yStart upload. When ready click on this button and wait for the images to upload.
Preview your site to see how they look. The images you have just uploaded each have their own record in the admin system and can be found in Images/Galleries > Images. Here you can also upload images one at a time.
Don't worry if you've messed up or forgotten to assign your images to a gallery. The appendix to this guide shows you how to delete images in bulk as well as move them around galleries, etc.
Before uploading any more images read the rest of this guide for additional options and tips.
2.2 If you prefer to prepare your own images
When you uploaded your images, our system compressed them and resized them for web use, so they won’t slow your site down. For large image files, there is an outside chance image quality may be compromised on upload. If so, you can always prepare your images offline and then upload them as we have just shown you.
If so, prepare your images in jpeg format, saved at 72 dpi resolution. Mac users must ensure the files have an extension of .jpg.
Save them to a fixed maximum width and height, as specified in your admin system, which you can see by clicking on Images/Galleries > Image settings.
Thumbnails are automatically generated from the enlargements, to manually upload thumbnails, upload at the same time but ensure _thumb is appended to the filename before the extension, e.g. portait_of_a_lady.jpg would have a thumbnail of portait_of_a_lady_thumb.jpg
Before spending too much time on this try it with just a handful of images until you have worked your way through this section.
We provide further instructions about image preparation, including how to batch process in Elements/Photoshop in our Cliktips Guide B1 Preparing your own images.
2.3 Image file names
If you would like a caption to appear (recommended for search engine purposes), rename the image on your computer, e.g. instead of IMG_1001.jpg, use Big_Ben.jpg.
Then in the bulk upload page ensure Get caption from file name is ticked. Now when you bulk upload our system will automatically generate a caption of Big Ben (the underscore acts as a space). This can save hours and is excellent for search engine purposes.
If you need a unique reference ID (normally for shopping cart purposes), put the reference at the start of the file name followed by a hyphen, e.g. if you use the file name 123-Flying_Osprey.jpg, ensure Get ref from file name is checked, and a reference of 123 will also be generated.
2.4 Adding a watermark
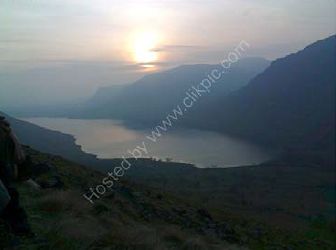
Watermarks are a great way of protecting your images and warding off image predators. Our system makes it very easy to add them, either using our own default watermark or using one you create yourself. In the admin system, go to Images/Galleries > Image settings > For the default watermark tick against the field Watermarks > Save. Now all images will show this watermark after you have uploaded them.
If you are able to create a gif or png file and would like to create your own watermark, you can add this instead using the Watermark file field in Image settings.
Important notes
You must do this BEFORE you upload any images. It will NOT apply to any images already on the system unless you delete and re-upload them!
So if you want to subsequently remove the watermark, you will also need to re-upload.
Watermarks only appear on image enlargements, not thumbnails.
2.5 Deleting the default images
Your site template may have default images that need to be removed before you makelive.
Go to Images/Galleries > Images. Click on the TABLE button in the top left corner. Tick all of the records you would like to delete (or select them all by ticking the tick box at the very top of the tick box column in the top left). Then scroll down to the bottom and click on DELETE MARKED. That’s it!
2.6 Assigning your images to the home page, slideshow section and carousels
Once you have uploaded your images you can now assign them to the various parts of your website where they are displayed such as your home page or a slideshow section. This is done by selecting an Image set in the respective image record. Go to Images/Galleries > Images > Edit an image by clicking on the pencil icon > Scroll down until you see the Image set field > Simply select the Image set you require, eg Home page images > Save.
It can be quicker to do this in bulk. See the appendix to this guide for information on how to do this.
Please note the following about image sets:
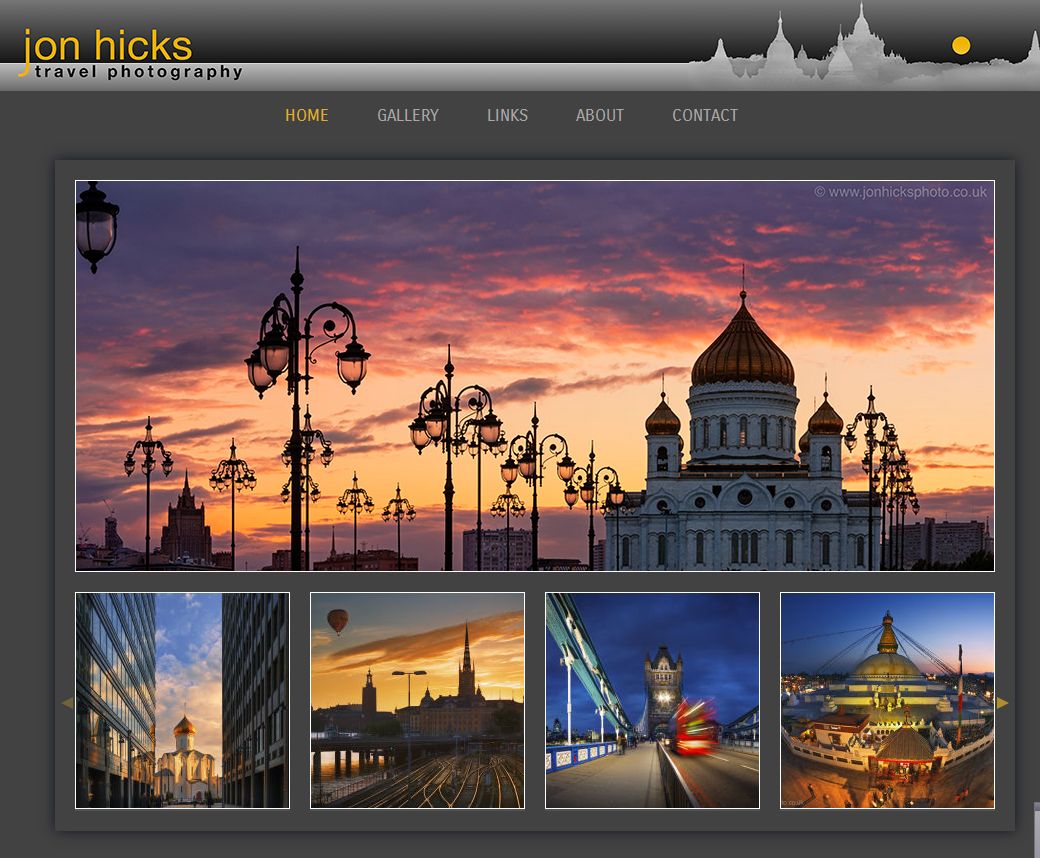
Home page images. For some templates you should select images that are similar in shape to those in the template, or else you may mess up the overall style and look. If you do not assign images to the home page, the system will randomly select them irrespective of shape. For most templates, there is a slideshow on the home page, so select more than one image. Some templates just have a static image, if you assign more than one image then the system will randomly rotate each time the user clicks on your home page, which is quite a neat feature to add variety.
John Hicks example. Jon has been careful to use a panoramic as his main image, a standard landscape would be too deep. For this template, the thumbnail images are the first four gallery heading images. Each time you click on his home page a different set of images appear.
Gallery headings. These are the images the user sees when the click on the main Gallery section.
Background images. Only used with templates where an images is displayed as a background.
An image can appear in as many Image sets as you like.
3. Upload some more images
Try some more image uploads and new galleries to familiarise yourself with the system. It is crucial you get your images as you want them, so if you have any problems or questions at this stage please do not hesitate to email us.
4. The next stage
Now that you have uploaded some images your website has started to take shape and look like your own. If you are still a bit unsure about how to manage images have a read of the appendix below, otherwise move on to the next stage: User Guide Stage III: The home page
5. Appendix: Managing your images (sort order, changing galleries, deleting, bulk changes, etc)
5.1 General
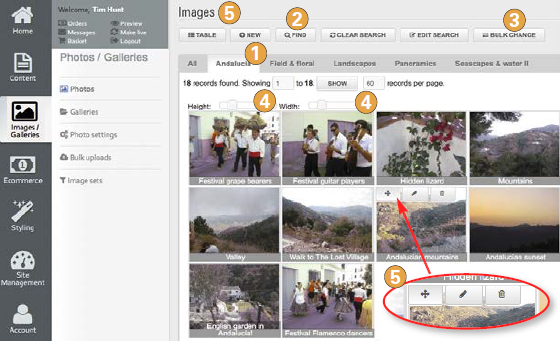
Once you have uploaded your images you can view and edit them by going to Images/Galleries > Images in the admin system. Here they can be viewed by gallery or as a complete list q.
5.2 How to edit a single image
Go to Images/Galleries > Images > Click on the Gallery the image is in q. Alternatively click on FIND w at the top and enter the data unique to the image such as gallery, image id or the caption. Then search.
To move the image order within a gallery. Hover over the image. Click on the re-order icon (the 4 arrows t), hold, then drag the image where you’d like it to appear.
To edit the image record. Just click on the pencil icon to get to the image record t.
To delete the image. Click on the delete icon. Please note the image will still appear until you have refreshed/reloaded your page.
5.3 How to edit a group of images
This would typically include deleting a batch of images or moving them from one gallery to another.
Stage I: Find the images
Firstly, find the images you would like to edit. To do this, click on FIND w and search according to whatever criteria you are looking for, eg what gallery they are in or what Image set. Just left click on the respective field and choose from the drop down list.
Stage II: Edit the images you find
Once you have done your search, click on the TABLE button in the top left t. The system changes the format the results appear in, as in this example below.
If you want to edit all of the records you have found, click on the BULK CHANGE button right at the top e. (Deleting images is slightly different, see below.)
Whatever you select/enter here will then be applied to all of the images remaining in your find. So if you select a particular gallery, for example, they will all be assigned to that gallery.
If you do not want to edit all of the records, then tick the ones you would like to select (or deselect). Scroll down and click on SHOW MARKED ONLY or HIDE MARKED to tell the system which images you would like to omit before editing them. TIP: If you want to edit the majority of the records you have found, click on the tick box at the very top of the tick box column (in the top left), which will automatically select all of the records. Then simply untick the ones you do not want.
To delete all of the images in your find, again click on the TABLE button, then tick the all of the records you would like to delete. Don't forget you can select them all by ticking the tick box at the very top of the tick box column in the top left. Then scroll down to the bottom and click on DELETE MARKED.
5.4 Adjusting thumbnail view height and width r
We have included these to help with viewing, especially when looking at a lot of images. Just use the sliders to alter how the images appear on your screen. They do NOT affect the image width on your live site!
